About Me

- Tezza
- Adelaide, Australia
- I am a fulltime Mum of 2 kids, I work part time and play with psp in my spare time. Ive been psp-ing now since 2007. I started with digital scrapbooking, then tagging in 2008, and designing in 2009. In 2010 I started writing scripts and found my calling (and addiction). You will find all kinds of freebies here on my blog, from tag/scrap templates, to kits and scripts. You can read my Terms Of Use by clicking the page up above too.. Thanks for taking the time to stop by.
Sunday, March 11, 2012
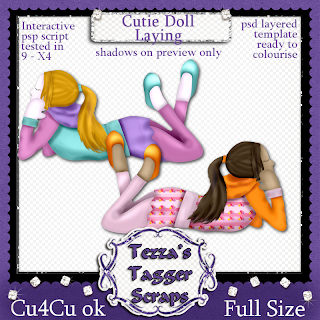
I have loaded this new cutie doll in stores today!
For more information, you can click any store blinkie to the left to take you over.
Im currently on sale in stores for 35% OFF!!
 I have decided to do a tutorial (which I dont do often..or at all) as this kit has such an awesome meaning behind it.
 I have decided to do a tutorial (which I dont do often..or at all) as this kit has such an awesome meaning behind it.
So, to create this tag we are using a FTU kit by Wicked Princess Scraps called
"Rays Of Hope"
You can download this kit on her blog here.
This tag is created by me, and any resemblence to others is purely by coincidence.
I have created this in pspX3 and is written based on having basic knowledge of psp.
Here's a list of what we will use from the kit, so open them all up into psp
Papers:
PP6
PP3
PP5
Elements:
Droplets
Flower 4
Doodle
Glitter
Polaroid
Window
Choose a doll from the kit to use in your tag, or you can use a tube that you hold a licence for.
I am using a tube by Suzanne Woolcott.
You can find her here.
Create a canvas 800x800 pixels, I have done this at 300ppi as we will reduce the size.
In your materials palette, close foreground, and in background> patterns, choose PP6 for your fill with angle 0 and scale 50
We need the preset shapes tool using star 2.
Draw out your star to your desired size. Convert to raster layer.
I have set the star at the top about 1/3 way in from the left.
Then add drop shadow - I have used settings vertical 4, Horizontal 5, opacity 75, blur 15.
In your materials, choose PP3 for your background, angle 0 and scale 50.
Draw out your circle to your desired size and convert to raster layer.
Move the layer down under the star, and add dropshadow.
In your materials, choose PP5 for your background, angle 0 and scale 50.
Using the rectangle tool > square, draw out a square to your desired size, and if you wish, you can round off the corners. Ive left mine sharp.
Convert to raster layer, and move the square under the circle layer. Add Dropshadow.
I have placed mine just under the tip of the star and inside left of the circle.
If you wish to add a mask to this layer, you can. I have used psp mask - edge squares.
Once you have added your mask, merge the group.
Using the background fills with the first two we used, draw out rectangles to sit above your square layer,
you can choose the length and width of the rectangles you like, and the amount.
I have created 3 for mine. Once you have drawn out each rectangle, convert to raster layer and add dropshadows.
Copy and paste the droplets element as a new layer, resize to 75%, bring the layer to the top of your circle and centre it to your circle.
Add dropshadow, I reduced the blur to 5.
Copy and paste flower 4 as a new layer. Mirror image it, and resize to 75%.
Place it on the top right of your square layer and add dropshadow. I changed the blur to 9.
Copy and paste doodle as a new layer, flip the image and reduce to 75%. Move it to the bottom right corner,
above the rectangles. Add dropshadow.
Copy and paste glitter as a new layer, resize to 50% and place lower left over the rectangles, and under the doodle layer.
Add dropshadow, I reduced the blur to 5.
Copy and paste polaroid as a new layer, resize to 50% and move the layer down to sit above your square layer.
Add dropshadow, I resized the blur to 11.
Copy and paste window as a new layer, resize to 48% and place over the polaroid. Bring the layer to the top so it sits under the flower and the doodle.
Add dropshadow.
Select your star layer, and move down the layers to below the window.
Copy and paste ribbon 2, resize to 50% and place at the bottom of the window.
Bring the layer to the top, and add dropshadow.
Now you can add a doll from the kit to sit above the ribbon, or any paid tube you hold a license for.
If you need to move the layer below the ribbon you can, then add dropshadow.
Add your name in text to the ribbon, and add any copyrights you need to the tag.
Merge all layers, and reduce all layers by 50%.
Save as either a jpeg or png image.
That's it, you're done.
Enjoy and have fun with your creativity.
Subscribe to:
Post Comments
(Atom)
Follow Me
Message Me
Search
Networked Blogs
Categories
- advertising (2)
- alpha (2)
- animals (6)
- australia day (1)
- award (2)
- awareness (2)
- baby (1)
- blog train (3)
- books (1)
- bookworm (1)
- Brag book (3)
- butterfly blush (1)
- buy my store (5)
- calendar (7)
- canada (1)
- celebrations (1)
- charity collaboration (2)
- charity kit (2)
- Christmas (29)
- clip art (2)
- collab (3)
- combo packs (2)
- commercial use (17)
- cooking (1)
- CT Call (1)
- CU (28)
- CU Freebie (14)
- CU Grab bag (6)
- cu4cu (58)
- cupcake (1)
- daffodil (1)
- Designer Call (1)
- designer service (1)
- designer stash (4)
- Desktop (8)
- digi free (106)
- digiscrap (99)
- doll (1)
- Easter (11)
- elements (11)
- emo (5)
- exclusive (1)
- Fall (9)
- fantasy (1)
- flower (5)
- flower pot (1)
- flowers (2)
- football (2)
- frame (6)
- Frames (27)
- Free (12)
- Freebie (193)
- fundraising (5)
- garden (3)
- girl stuff (3)
- goth (2)
- gradients (3)
- grand opening (1)
- halloween (11)
- heart (2)
- Heartbeatz Creationz (1)
- holidays (1)
- horse shoe (1)
- jungle (1)
- kit (13)
- kits (1)
- layouts (1)
- lilly (1)
- love flower (1)
- Mask (14)
- Mini kit (22)
- mushroom (1)
- music (1)
- New in store (4)
- new years (2)
- Overlays (5)
- page border (1)
- Papers (17)
- patchwork (1)
- Patriotic (2)
- penguin (1)
- personal use (6)
- photo clips (1)
- psd Templates (84)
- psp gradients (2)
- psp scripts (78)
- pu (1)
- punk (2)
- quickpages (23)
- reading (1)
- retired (8)
- ribbons (2)
- romance (2)
- roses (1)
- sale (30)
- savings (6)
- school (2)
- Scrap kit (8)
- scrapbooking (80)
- script (2)
- script club membership (3)
- scripts (42)
- shoes (1)
- spring (19)
- spring doodle (1)
- St.Patricks Day (5)
- store colabs (10)
- store news (78)
- store offers (1)
- summer (6)
- Tag (75)
- Tagger kit (32)
- template (65)
- templates (1)
- thanksgiving (4)
- timeline covers (1)
- tubes (5)
- tulip (1)
- tutorial (21)
- UK (1)
- USA (1)
- valentines (20)
- vintage (3)
- whimsical (1)
- winter (5)
- word art (2)





0 comments:
Post a Comment