About Me

- Tezza
- Adelaide, Australia
- I am a fulltime Mum of 2 kids, I work part time and play with psp in my spare time. Ive been psp-ing now since 2007. I started with digital scrapbooking, then tagging in 2008, and designing in 2009. In 2010 I started writing scripts and found my calling (and addiction). You will find all kinds of freebies here on my blog, from tag/scrap templates, to kits and scripts. You can read my Terms Of Use by clicking the page up above too.. Thanks for taking the time to stop by.
Blog Archive
- 2016 (3)
- 2015 (9)
- 2014 (12)
- 2013 (40)
- 2012 (49)
-
2011
(60)
- December(5)
- November(2)
- October(2)
- September(4)
- August(3)
- July(4)
- June(7)
- May(4)
-
April(11)
- NEW Garden Gnomes in store
- NEW in stores
- New in stores and a CU Freebie
- Spring Mini Kit Freebie
- Mini Kit Freebie
- Thrifty Thursday 99 cent sale & a tutorial
- New tagger kit in stores and a tutorial by Me
- Sneak Peek and a Tutorial
- New products in store and a freebie
- Springy Easter Tutorial
- Autism Awareness Month Freebie, Sale, and NEW in s...
- March(10)
- February(3)
- January(5)
- 2010 (84)
- 2009 (100)
Monday, April 11, 2011
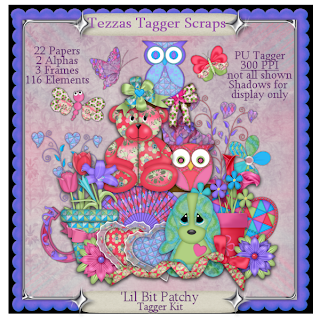
I have added a new tagger kit in stores today.
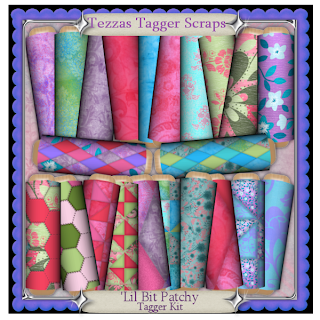
This kit is designed with my patchwork products and called 'Lil Bit Patchy.
You can find this in Butterfly Blush and Treasured Scraps for 50% off for the month of April.
 Using my kit I have created a tag tutorial for you.
I dont do tutorials very often so I hope this is easy for you to follow.
Here's the tag and tutorial:
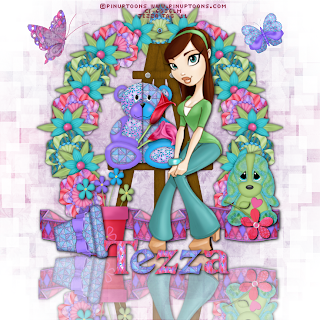 I have written this tutorial using psp X2
This is my creation and any resemblance to any other tutorial is not intended.
I have written this assuming you have a knowledge of paint shop pro.
You do not have to follow this tutorial precisely, feel free to use it as a guide and personalise your own tag if you wish.
In this tutorial I have used my own tagger kit 'Lil Bit Patchy - you can find it in my stores, click the blinkies to the left to go there.
I have also used my patchwork masks in stores.
Tube of my choice is by ©PinUpToons and is a PTU licensed tube you can find here.
To start
Open an 800x800 canvas
Using a paper of your choice, flood fill it to your canvas.
Next load a mask of your choice.
Layers > load/save mask > load mask from disk > load
then merge your group
layers > merge > merge group
Open and copy & paste the easel into the canvas, this will be used as your centre. Add your choice of drop shadow.
Open and paste a folded ribbon of your choice, then resize to 75% and place at the bottom of the easel. Add your choice of drop shadow.
Open your first flower of choice, I have used velvet flower 2,copy & paste, resize 50% and place at the top of the easel, add drop shadow and arrange the layer below the easel.
Open your third flower of choice, I have used flower 5,copy & paste, resize to 45% and place to one side of the easel, below the first flower. Add your drop shadow.Then duplicate the flower and mirror image.
right click > duplicate> Image > mirror.
Open your third flower of choice, I have used velvet flower 1,copy & paste, resize 50% and place to one side of the easel, below the second flower. Add your drop shadow.
Then duplicate the flower and mirror image.
Continue duplicating and arranging your flowers until you have a flower arch.
Open your patchwork animal of choice, I have used Patchwork Bear 2, copy & paste, resize to your desired size, add drop shadow and place on the bottom ledge of the easel.
Open your second patchwork animal of choice, I have used puppylove 2,copy & paste, resize to your desired size, add drop shadow, and place on the side of the folded ribbon, arrange the layer above the ribbon.
Continue adding your desired elements to the tag, flowerpots, flowers etc and resizing and adding drop shadows to your desire.
Add your choice of tube to sit on the easel with your patchwork animal, I have used a PTU Tube by ©PinUpToons, this tube needs a license to use.
Next, in your layer palette, click your background paper to turn off the visibility by clicking the eye. Then back to your canvas, click the pan tool > right click on canvas > copy merged >
then right click again > paste as new layer.
With this layer we want to flip it so go to Image > flip
Move this merged layer down to the bottom of the tag so the edges meet up.
In the layer palette, right click this layer > properties > then adjust the opacity to 50 > ok.
Click your visibility again on your background layer to turn it back on.
Now add your correct licensing number and details to the tag and your name in your font of choice
or use the included alphas with your own drop shadows.
Now you can resize the tag to your choice of size and save as png file.
That's it, hope you enjoyed this tutorial, and feel free to email me any of your creations for me to show off (or not, lol)
Thank you.


 Using my kit I have created a tag tutorial for you.
I dont do tutorials very often so I hope this is easy for you to follow.
Here's the tag and tutorial:
 I have written this tutorial using psp X2
This is my creation and any resemblance to any other tutorial is not intended.
I have written this assuming you have a knowledge of paint shop pro.
You do not have to follow this tutorial precisely, feel free to use it as a guide and personalise your own tag if you wish.
In this tutorial I have used my own tagger kit 'Lil Bit Patchy - you can find it in my stores, click the blinkies to the left to go there.
I have also used my patchwork masks in stores.
Tube of my choice is by ©PinUpToons and is a PTU licensed tube you can find here.
To start
Open an 800x800 canvas
Using a paper of your choice, flood fill it to your canvas.
Next load a mask of your choice.
Layers > load/save mask > load mask from disk > load
then merge your group
layers > merge > merge group
Open and copy & paste the easel into the canvas, this will be used as your centre. Add your choice of drop shadow.
Open and paste a folded ribbon of your choice, then resize to 75% and place at the bottom of the easel. Add your choice of drop shadow.
Open your first flower of choice, I have used velvet flower 2,copy & paste, resize 50% and place at the top of the easel, add drop shadow and arrange the layer below the easel.
Open your third flower of choice, I have used flower 5,copy & paste, resize to 45% and place to one side of the easel, below the first flower. Add your drop shadow.Then duplicate the flower and mirror image.
right click > duplicate> Image > mirror.
Open your third flower of choice, I have used velvet flower 1,copy & paste, resize 50% and place to one side of the easel, below the second flower. Add your drop shadow.
Then duplicate the flower and mirror image.
Continue duplicating and arranging your flowers until you have a flower arch.
Open your patchwork animal of choice, I have used Patchwork Bear 2, copy & paste, resize to your desired size, add drop shadow and place on the bottom ledge of the easel.
Open your second patchwork animal of choice, I have used puppylove 2,copy & paste, resize to your desired size, add drop shadow, and place on the side of the folded ribbon, arrange the layer above the ribbon.
Continue adding your desired elements to the tag, flowerpots, flowers etc and resizing and adding drop shadows to your desire.
Add your choice of tube to sit on the easel with your patchwork animal, I have used a PTU Tube by ©PinUpToons, this tube needs a license to use.
Next, in your layer palette, click your background paper to turn off the visibility by clicking the eye. Then back to your canvas, click the pan tool > right click on canvas > copy merged >
then right click again > paste as new layer.
With this layer we want to flip it so go to Image > flip
Move this merged layer down to the bottom of the tag so the edges meet up.
In the layer palette, right click this layer > properties > then adjust the opacity to 50 > ok.
Click your visibility again on your background layer to turn it back on.
Now add your correct licensing number and details to the tag and your name in your font of choice
or use the included alphas with your own drop shadows.
Now you can resize the tag to your choice of size and save as png file.
That's it, hope you enjoyed this tutorial, and feel free to email me any of your creations for me to show off (or not, lol)
Thank you.

Subscribe to:
Post Comments
(Atom)
Follow Me
Message Me
Search
Archives
-
▼
2011
(60)
-
▼
April
(11)
- NEW Garden Gnomes in store
- NEW in stores
- New in stores and a CU Freebie
- Spring Mini Kit Freebie
- Mini Kit Freebie
- Thrifty Thursday 99 cent sale & a tutorial
- New tagger kit in stores and a tutorial by Me
- Sneak Peek and a Tutorial
- New products in store and a freebie
- Springy Easter Tutorial
- Autism Awareness Month Freebie, Sale, and NEW in s...
-
▼
April
(11)
Networked Blogs
Categories
- advertising (2)
- alpha (2)
- animals (6)
- australia day (1)
- award (2)
- awareness (2)
- baby (1)
- blog train (3)
- books (1)
- bookworm (1)
- Brag book (3)
- butterfly blush (1)
- buy my store (5)
- calendar (7)
- canada (1)
- celebrations (1)
- charity collaboration (2)
- charity kit (2)
- Christmas (29)
- clip art (2)
- collab (3)
- combo packs (2)
- commercial use (17)
- cooking (1)
- CT Call (1)
- CU (28)
- CU Freebie (14)
- CU Grab bag (6)
- cu4cu (58)
- cupcake (1)
- daffodil (1)
- Designer Call (1)
- designer service (1)
- designer stash (4)
- Desktop (8)
- digi free (106)
- digiscrap (99)
- doll (1)
- Easter (11)
- elements (11)
- emo (5)
- exclusive (1)
- Fall (9)
- fantasy (1)
- flower (5)
- flower pot (1)
- flowers (2)
- football (2)
- frame (6)
- Frames (27)
- Free (12)
- Freebie (193)
- fundraising (5)
- garden (3)
- girl stuff (3)
- goth (2)
- gradients (3)
- grand opening (1)
- halloween (11)
- heart (2)
- Heartbeatz Creationz (1)
- holidays (1)
- horse shoe (1)
- jungle (1)
- kit (13)
- kits (1)
- layouts (1)
- lilly (1)
- love flower (1)
- Mask (14)
- Mini kit (22)
- mushroom (1)
- music (1)
- New in store (4)
- new years (2)
- Overlays (5)
- page border (1)
- Papers (17)
- patchwork (1)
- Patriotic (2)
- penguin (1)
- personal use (6)
- photo clips (1)
- psd Templates (84)
- psp gradients (2)
- psp scripts (78)
- pu (1)
- punk (2)
- quickpages (23)
- reading (1)
- retired (8)
- ribbons (2)
- romance (2)
- roses (1)
- sale (30)
- savings (6)
- school (2)
- Scrap kit (8)
- scrapbooking (80)
- script (2)
- script club membership (3)
- scripts (42)
- shoes (1)
- spring (19)
- spring doodle (1)
- St.Patricks Day (5)
- store colabs (10)
- store news (78)
- store offers (1)
- summer (6)
- Tag (75)
- Tagger kit (32)
- template (65)
- templates (1)
- thanksgiving (4)
- timeline covers (1)
- tubes (5)
- tulip (1)
- tutorial (21)
- UK (1)
- USA (1)
- valentines (20)
- vintage (3)
- whimsical (1)
- winter (5)
- word art (2)






0 comments:
Post a Comment